
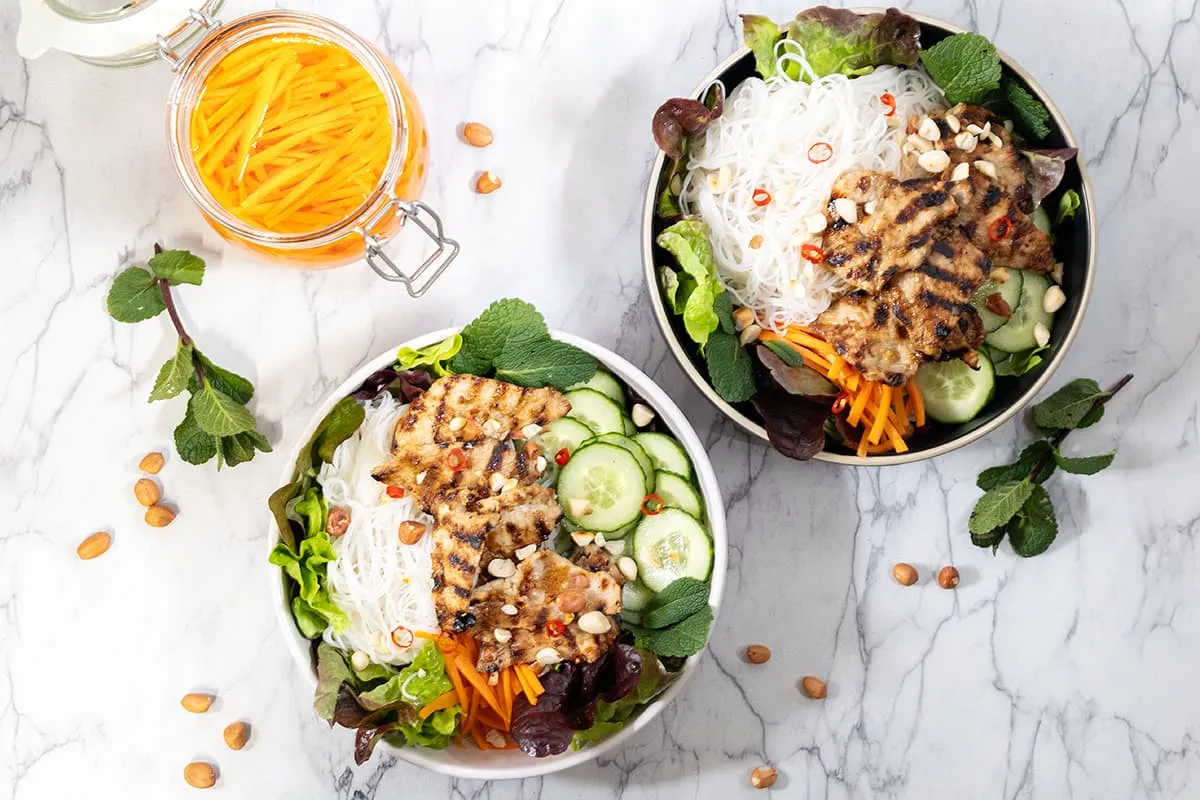

Want to make your food look as good as it tastes? You don't need a professional camera or a studio setup to get there. Today's iPhone cameras are powerful enough to capture stunning, mouth-watering shots, and the best part is, you already have one in your pocket.
With just a few simple tricks, you can take your food photography from snapshots to scroll-stopping in no time. We will show you how to take good food photos with iPhone, covering everything from finding the perfect light to the one camera setting most people never touch.
Why iPhone Is Perfect for Food Photography
You do not need a professional camera to take great food photos. An iPhone already gives you the tools required to capture clean, detailed, and visually appealing shots. The main advantage is not just camera quality, but how everything works together in one device.
- Modern iPhones combine strong lenses with software that automatically adjusts exposure, color, and dynamic range. Features like HDR help balance bright highlights and darker areas, which is especially useful when shooting near windows or in uneven lighting.
- Another advantage is speed and convenience. Food does not wait. Steam fades, sauces settle, and textures change within minutes. With an iPhone, you can take a shot immediately, adjust settings on the spot, and review the result without interrupting the moment. This makes it easier to capture food when it looks its best.
In short, the iPhone removes most of the barriers that usually come with photography. You can focus on the dish, the light, and the composition instead of the equipment, which is exactly what food photography depends on. Now, let’s talk about to how to take photos of food on iPhone.
How to Take Food Photos with an iPhone
At its heart, iPhone food photography comes down to a few fundamentals that never change: a clean background, quality light, intentional composition, and a steady hand. Here are the best food photography tips for iPhone:
Tip 1: Make Your iPhone Ready Get Ready Before Taking Photos
A great photo begins long before you tap the shutter, it starts with solid preparation. Make sure your iPhone is fully charged, or keep a power bank or charging cable nearby so the session doesn’t get interrupted. Clean the camera lens to avoid soft or hazy shots, especially in close-ups where every flaw is noticeable.
Next, check your storage. A full gallery can quickly become a problem during a shoot, since photos and videos add up fast. It’s better to free up space in advance so you don’t have to stop midway. You can move older files to iCloud or another storage, or remove anything you no longer need. If you prefer a faster cleanup, tools like Clever Cleaner can help remove duplicate photos, similar images, screenshots, and large files without much effort.
This way, you keep enough free space for new shots and make it easier to review and sort your photos after the shoot.
Here is how to clean your gallery:
- Download Clever Cleaner: AI Cleanup App from the App Store.
- When you first open the app, you will need to grant Full Access to your photo library. It is completely safe to do so.
- Similars opens automatically once you grant full access to your photo library. From there, you can tap Smart Cleanup to remove all duplicate and similar photos at once. Alternatively, you can tap a group of photos that you want to review in detail.
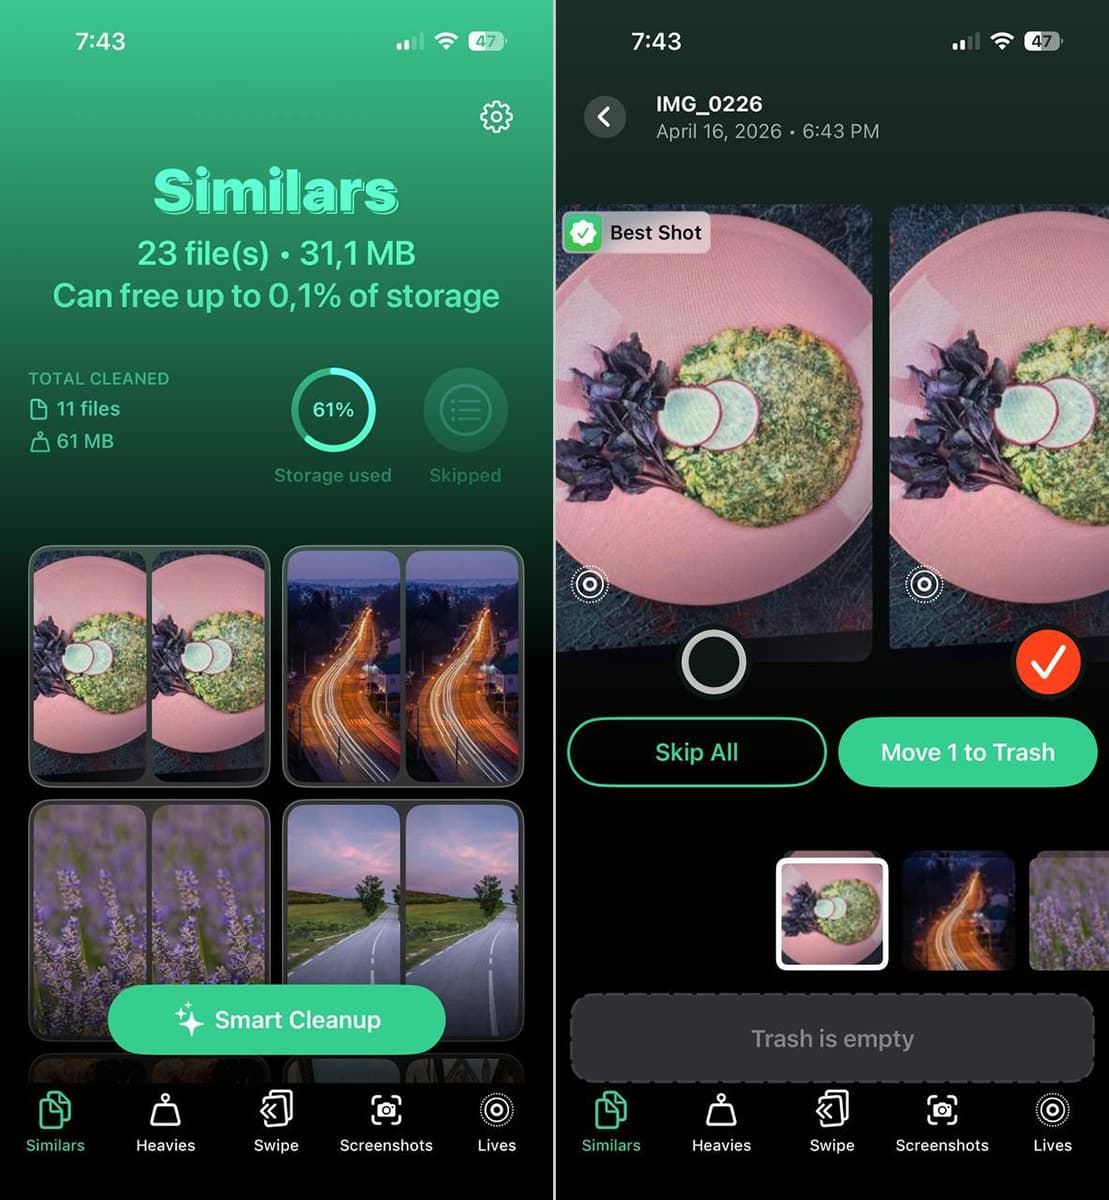
- For each group of similar or duplicate photos, Clever Cleaner automatically chooses the Best Shot. The less strong shots are selected as candidates for deletion. After verifying the selection, tap the Move to Trash button.
- Right after moving your rejected photos to the Trash, a pop-up will appear at the bottom of your screen. Tap the Empty Trash button inside the pop-up to confirm the deletion.
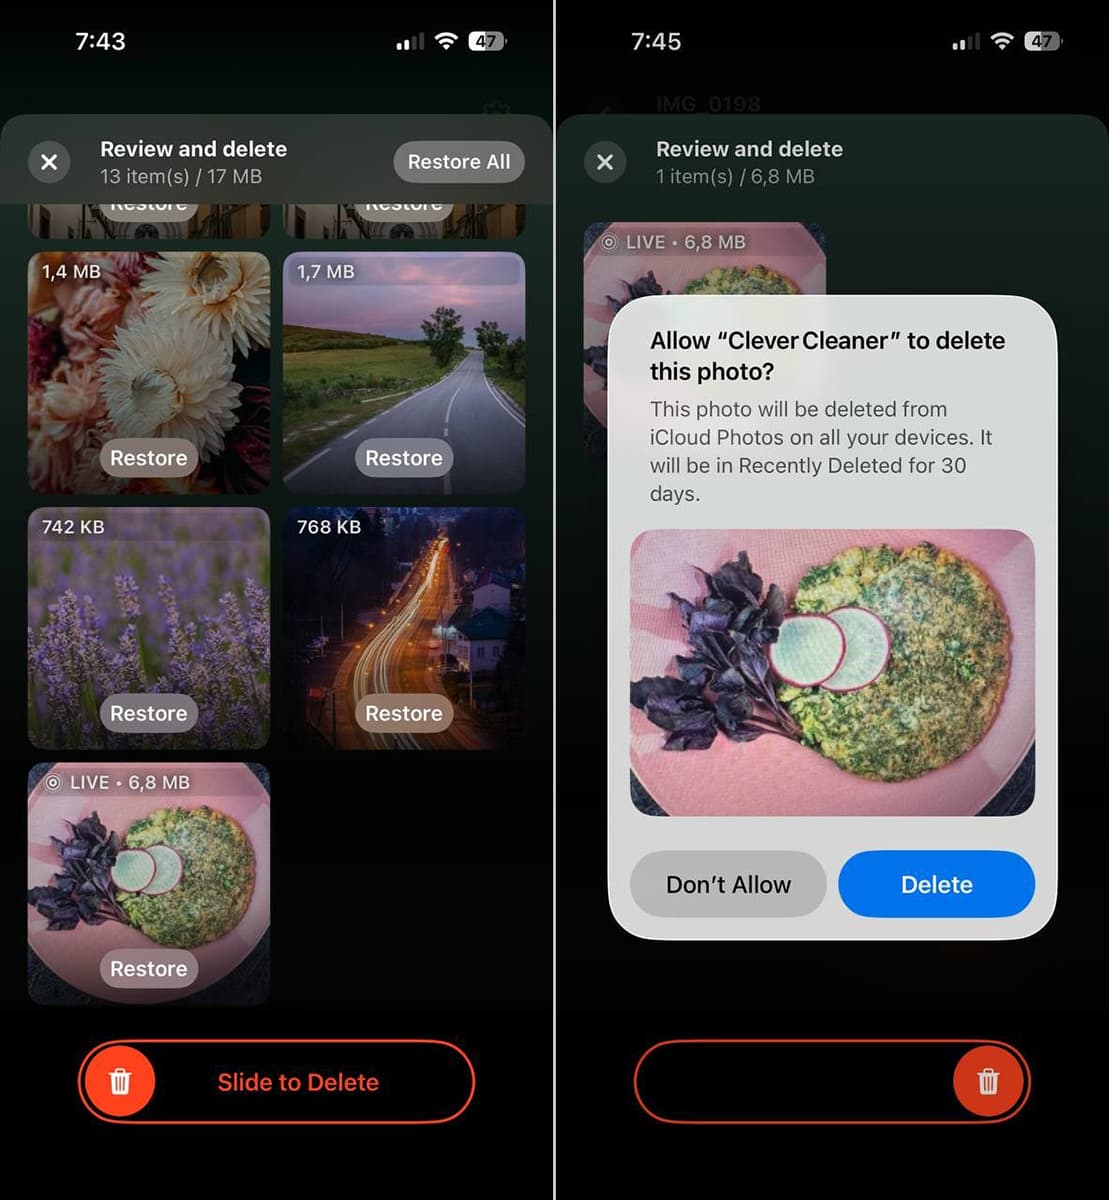
Clever Cleaner also has a few other modes worth knowing about. Swipe lets you go through individual photos one by one using swipe gestures to keep or delete them. Screenshots collects all your screenshots in one place so you can review and clear them in bulk. Lives converts Live Photos into high-quality still images to save space without losing the shot. Heavies helps you find and trim large videos or compress them without affecting quality, and unlike the native Photos app, you can sort by size and date.
You can find more information about the tool and other methods to clean up the gallery in this guide.
Tip 2: Prepare the Background
Before you even open the Camera app, look at the space around the dish. The background has a huge effect on the final result because it shapes how clean or distracting the photo feels. Food usually looks best against simple surfaces that do not compete for attention. Neutral countertops, wooden tables, plain placemats, linen napkins, ceramic plates, and muted props usually work better than loud colors, shiny packaging, or crowded kitchen items.
This does not mean the frame has to be empty. A spoon next to soup, a folded napkin near pastries, a glass beside a drink, or a few ingredients placed around the plate can make the photo feel more complete. The key is restraint. Each object in the frame should help the dish, not pull attention away from it. When the background feels chaotic, the viewer’s eye stops moving to the food first.
Tip 3: Adjust Camera Settings
Most people open the Camera app and start shooting right away, but a few quick adjustments in Settings can make your photos more consistent and easier to edit later. iPhone handles a lot automatically, but taking control of a few key options helps you avoid common issues like poor composition, unnecessary resets, or lower-quality files.
Start by going through the main camera settings so your iPhone behaves the way you expect during the shoot:
- Open Settings on your iPhone.
- Tap Camera.
- Go to Formats and choose between High Efficiency and Most Compatible depending on your needs.
- Enable ProRAW & Resolution Control if you want maximum detail for editing (keep in mind it uses more storage).
- Return to Camera settings and open Preserve Settings to keep your preferred shooting mode and controls from resetting.
You can also turn on Grid to help with composition or enable Lens Correction for more natural-looking images.
These settings directly affect how your photos turn out. Higher-quality formats like ProRAW preserve more detail, which helps when adjusting exposure, shadows, and colors later, but they also take up significantly more space. Features like Grid improve composition immediately, while Preserve Settings saves time during longer shoots by keeping your preferred setup in place.
Tip 4: Use the Grid to Build a Better Composition
The Grid feature is one of the simplest tools in iPhone food photography, but it has a real impact on how balanced your shot looks. It helps you apply the rule of thirds, a composition technique that divides the frame into nine equal parts.
Instead of placing the dish directly in the middle every time, you can position the key part of the food along one of the grid lines or where those lines intersect. That usually creates a more natural and visually appealing image. Use the grid lines to place the main subject slightly off center. Keep table edges, plates, and props aligned with the frame
Tip 5: Control Exposure and Use Zoom Properly
When you want to get closer to the dish, avoid dragging the zoom slider to random values like 1.6x or 2.3x. These are digital zoom levels, and they reduce image quality, which becomes very noticeable. Instead, use the default zoom steps available on your iPhone, such as 2x, 3x, or higher depending on the model.
These rely on the phone’s actual lenses, so details stay sharper and the image holds up better after editing. If the framing still feels slightly off, it is better to shoot at one of these fixed zoom levels and adjust the crop later rather than forcing a non-standard zoom value.
Exposure control is just as important. iPhone adjusts brightness automatically, but it does not always get it right for food. A white plate can look too bright, while darker scenes can lose detail in the shadows. To fix this, tap on the dish to focus, then use the exposure slider that appears next to the focus box.
Slide it up to brighten the image or down to reduce brightness until the food looks natural and balanced. If you plan to take several shots from the same setup, press and hold on the subject to lock focus and exposure. You can also adjust exposure directly through the camera controls:
- Tap the six dots icon at the top of the Camera interface to open additional settings.
- Then select Exposure.
- Fine-tune it before taking the shot.
This prevents the camera from constantly readjusting and keeps your results consistent.
Tip 6: Use iPhone Tools for Action and Sharpness
Some of the most eye-catching food photos capture movement. Think syrup pouring over pancakes, sauce falling onto pasta, steam rising from a hot plate, or a drink mid-pour. These shots are hard to catch with a single tap. That is where Live Photos and Burst Mode become useful. They give you a sequence of frames, so you can choose the best one afterward instead of hoping the exact moment lands perfectly.
- Live Photos work well when the movement is short and controlled. Afterward, you can scroll through the captured sequence and choose the strongest frame as the key photo.
- Burst Mode is great for faster motion because it captures many frames in rapid succession.
Both tools make food photography on iPhone much easier when you want something more dynamic than a still plate on a table.
Tip 7: Work with Light, Not Against It
Lighting shapes every part of a food photo. It affects texture, color, shadows, and depth. Natural light remains the best option in most situations because it keeps food looking realistic and flattering. A spot near a window usually gives the best results. Side lighting is especially useful because it brings out texture in crusts, sauces, herbs, and layered dishes without making the image look flat.
Artificial lighting can work, but mixed light sources often create problems. Warm indoor bulbs plus daylight from a window can distort color and make the dish look dull or strange. Harsh overhead light can also produce unflattering shadows. Soft, indirect light is almost always the safer option. If the light is too strong, a thin curtain can help diffuse it. If shadows are too dark, a white surface opposite the light source can reflect some light back into the scene.
Here is how to take good food pictures with the best lighting:
- Shoot near a window
- Avoid flash
- Avoid mixed lighting
- Use side light for texture
- Diffuse strong sunlight when shadows look harsh
Tip 8: Use Portrait Mode for Depth
Portrait mode is not limited to people. It can work well for food because it softens the background and keeps the subject sharp, which helps separate the dish from everything around it. This becomes especially useful when the table includes props, textures, or other elements that might otherwise distract from the main subject.
At the same time, this mode should be used carefully. Since the blur is created by software, it can sometimes affect edges in an unnatural way, especially around utensils, herbs, or detailed shapes. That is why it helps to take a few shots and compare them with a standard photo. In some cases, moving slightly closer to the dish in regular Photo mode can create a more natural depth effect without relying on Portrait at all.
Tip 9: Do Simple Post-Editing on iPhone
After you take the photo, the built-in tools in the Photos app are often enough to improve the image. You do not need to push every slider or create a dramatic edit. Food usually looks better when the final image stays believable. The purpose of editing is to clean up the frame, correct light, and bring the dish closer to how it looked in real life.
What you can do in Photos app:
- Open the photo in the Photos app.
- Tap Edit.
- Start with Crop and remove anything unnecessary from the frame.
- Straighten the image if the table or plate looks tilted.
- Go to Adjust and make small changes to brightness, shadows, and highlights.
- Increase or decrease contrast only a little if needed.
If you want more control after that, you can move to dedicated editing apps. On iPhone, popular options like Adobe Lightroom, Snapseed, and VSCO give you more precise adjustments for color, exposure, and detail while still keeping the workflow simple.
For deeper edits on a computer, tools like Adobe Photoshop and Adobe Lightroom Classic are widely used. They allow more accurate control over lighting, color balance, and fine details, which can help when you want a consistent look across multiple photos.
Closing Words
Now you know how to photograph food with iPhone in a way that highlights texture, color, and presentation without relying on complex gear. Small adjustments in light, angle, and composition can completely change how a dish looks in a photo, and with a bit of practice, these choices become second nature.
At this point, you already have everything you need to capture strong shots. The next step is to refine them. Even a well-taken photo can benefit from a few simple edits to improve brightness, balance colors, and clean up the frame. That is where editing comes in, and it is the final step that helps turn a good photo into something polished and ready to share.
There aren't any comments left behind yet you can be the very first to comment!